使用AWS WAF V2 Managed Rules 配置 WordPress规则
一、背景
AWS在2019年底的 re-Invent 2019 大会上,发布了WAF V2产品,提供Managed Rules。
二、AWS的WAF如何实现
1、空白WAF引擎+第三方托管的规则
过去AWS一直提供一个空白的WAF过滤引擎,然后开放引擎给第三方传统安全厂家如F5、Fortinet等安全公司。第三方厂家制作 Managed rules subscription,放在 AWS Marketplace 应用市场里边出售订阅规则。每个厂家发布的订阅规则收费10~30USD每个规则。订阅规则采用“黑盒”模式,即对外不公布规则内部本身有哪些防护能力,属于厂家机密。这种方式的优势:弹性好,处理能力强,可以与CDN、ELB等组件关联,且天然高可用。
注:这种实现方式,中国本土的几家友商,一直在提供云厂商自己维护的规则列表,可以一键打开防护,不需要订阅第三方。
2、EC2+AMI+硬件厂家的虚拟化版本
此外,AWS的另一种实现WAF的方式,是通过Marketplace购买AMI的方式。也就是在EC2虚拟机上运行一个软件版本的防火墙软件,即可以理解为F5、Paloalto等硬件盒子的虚拟机版本。然后,将流量通过NLB送给这个EC2实例,进行流量过滤和清洗,再将干净流量送到应用服务器所在的EC2上。这种方式,可以享受到全功能的硬件体验,硬件盒子的管理界面、功能配置都是高度一致的。这种方式的优势:体验与过去用硬件盒子高度一致,功能非常强大,厂家覆盖全面,包括Cisco、Fortinet、Checkpoint、Paloalto等等一票国际大牌厂家。缺点:天然不高可用,需要多个EC2分别跑在不同AZ上实现高可用,还需要NLB调度流量,大带宽处理能力受到EC2网络限制。
注:这种实现方式,中国本土的几家友商,提供的多为本土厂家的虚拟防火墙镜像,例如深信服、绿盟等。
三、AWS新产品 – AWS管理的托管规则
在2019年底,AWS在以上第一种实现方式“空白WAF引擎+第三方托管的规则”的基础上,发布了由AWS自行管理的订阅规则,被称为第二代WAF,即WAF V2。在这个版本上,WAF控制台界面提供了一系列AWS自己维护的防护规则可以订阅。这种实现方式,如此,大大方便了使用,不需要再去关联第三方应用了。当然,这个订阅规则也是黑盒模型,不对外公开具体规则列表。
于此同时,原先的合作伙伴的订阅规则继续存在,可以作为相互的补充。
四、Wordpress兼容问题
这个规则上线后,第一时间放到了wordpress上防护体验,发现一些规则与wordpress不兼容,会影响正常使用,包括:发帖、上传图片等多种操作。错误现象可能表现为:发帖失败报告无效JSON,上传图片失败等。
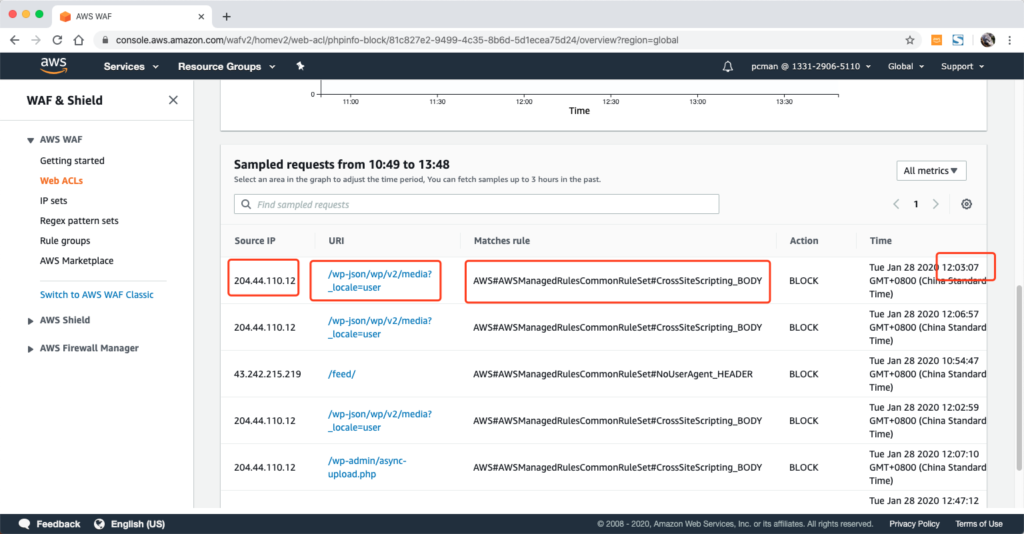
排查错误是否是代码错误还是WAF拦截可以从WAF控制台引擎入手。如下图所示,进入WEB ACLs界面,看到页面下方会显示最近近期规则拦截的情况(有几分钟延迟)。
查看日志可以通过源IP、访问地址、时间来判断是否是用户正常访问触发、还是恶意攻击扫描触发、还是自己调适错误触发。确定了要检查的是那一条后,看其中rules规则,即是触发拦截的规则。例如上图中是“AWS#AWSManagedRulesCommonRuleSet#CrossSiteScripting_BODY”这一条。
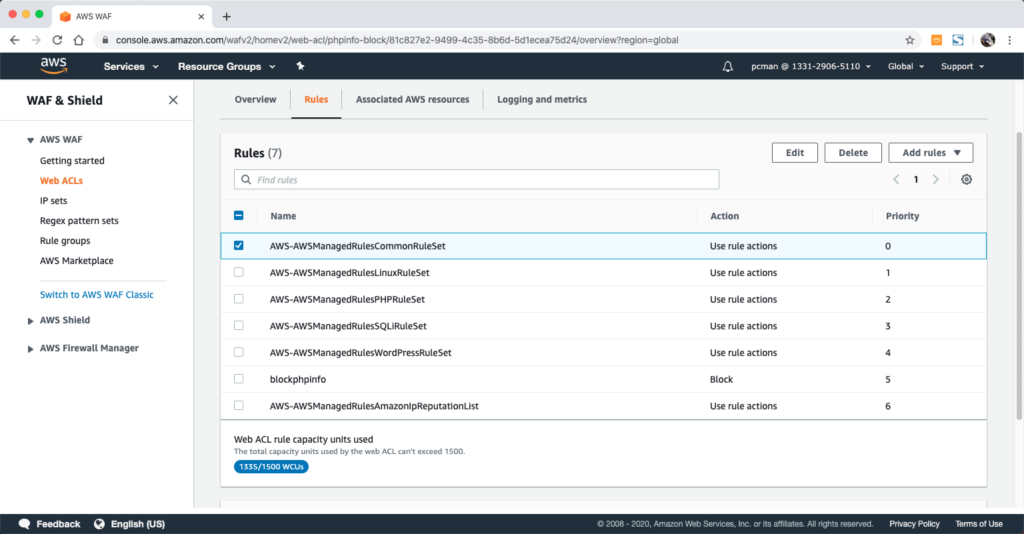
接下来进去rules界面,找到触发规则的“AWSManagedRulesCommonRuleSet”,在下面的截图中处于最上方第一条。点击右上角的Edit按钮。
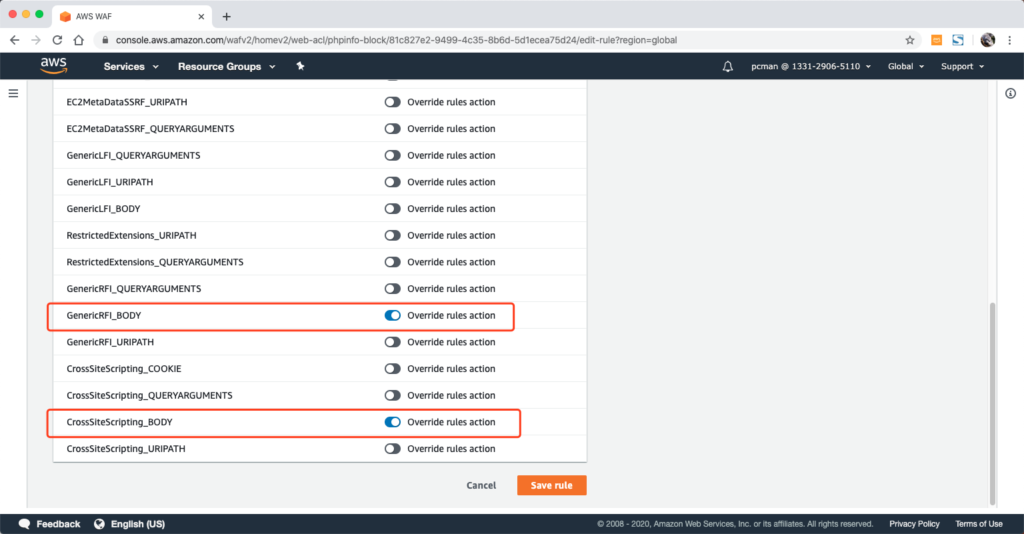
编辑界面下,从清单中,找到链接的规则,将其设置为override。如下截图中还有一条红色的也是类似方式检查出来的规则需要被跳过。
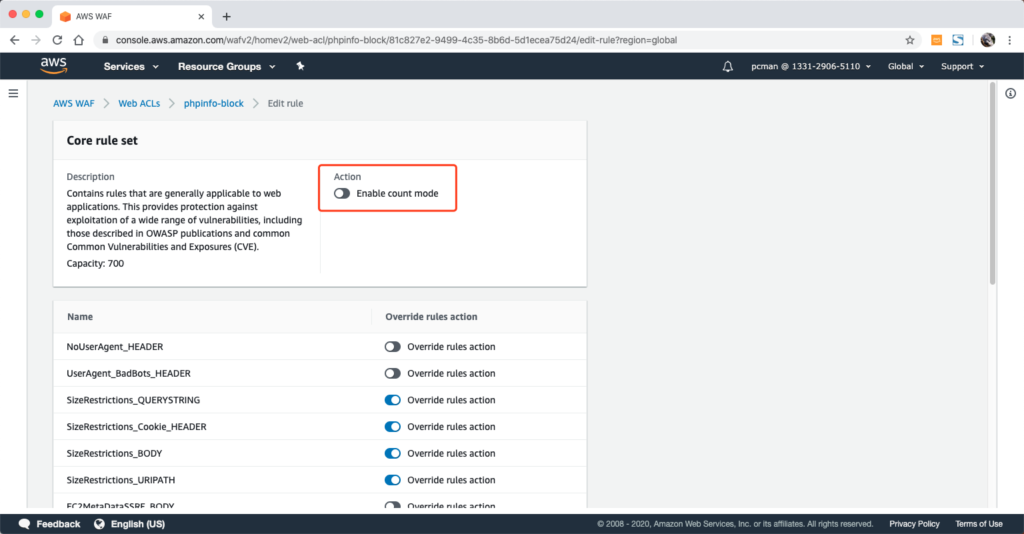
此时还需要注意,编辑规则的页面最上方还有一个统一的按钮:Enable count mode。注意这个开关需要处于关闭模式。只修改下方单独规则的跳过就可以,不要修改整个rule的actions。否则整个rule里边所有规则都将变成只计数不拦截了。
点击页面最下方的保存。
现在,再去访问Wordpress,尝试刚才触发拦截的操作,即可正常通过。
至此就给AWS WAF V2设置了针对的wordpress的bypass规则。
英文版教程
Use-case
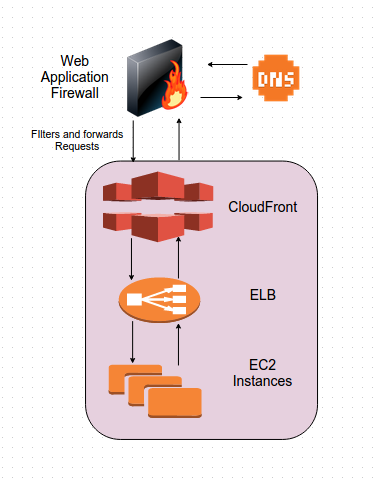
I have a PHP application running on EC2 in a load balanced environment. For better content delivery globally, I have also used AWS CloudFront. Recently there were hits from a lot of unknown IPs on the wp-login.php page of my website. I was trying to figure out what to do and how to prevent unwanted logins to wp-admin of my PHP blog website. The URI is actually wp-login.php which opens up wp-admin page. I decided to use AWS WAF – Web Application Firewall and give it a try and so far it seems good. I have setup a basic WordPress website for demo purposes of this blog and will try to allow only few IPs to be able to access wp-login.php.
Workflow of AWS WAF
Steps
What we will be doing is creating conditions as per requirement, adding them to rules and then finally adding these rules to web ACL in the AWS WAF service. After this we would need to associate this ACL with the CloudFront Distribution we want it to work for.
1. Open the AWS WAF console and go to Create new ACL:
Just enter a name for your new web ACL. I have used demo for this demo. Just click on next and go to the Create conditions step.
2. In this step, we will create 2 conditions. One for IP and the other for the URl string matching. So, firstly click on Create IP match condition.
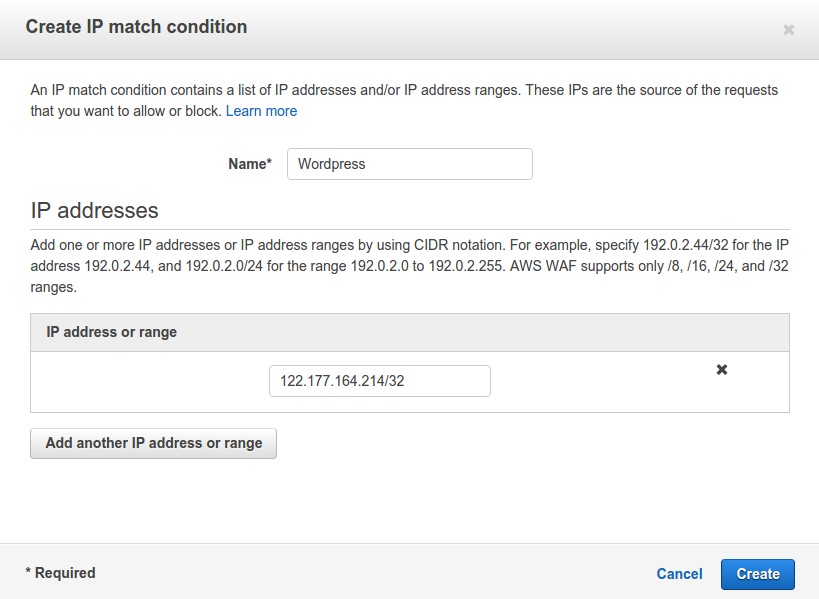
After this a window will pop out as below:
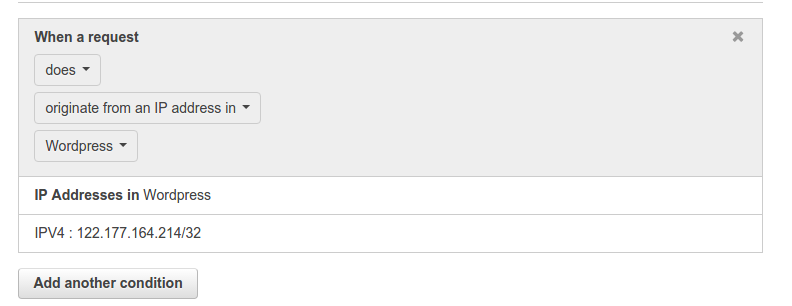
Give a name to this condition. I have named it as WordPress. Also, enter the IP addresses or IP address range for which you want to allow access to the wp-login.php page. Click on Create. It will return a message on the console like:
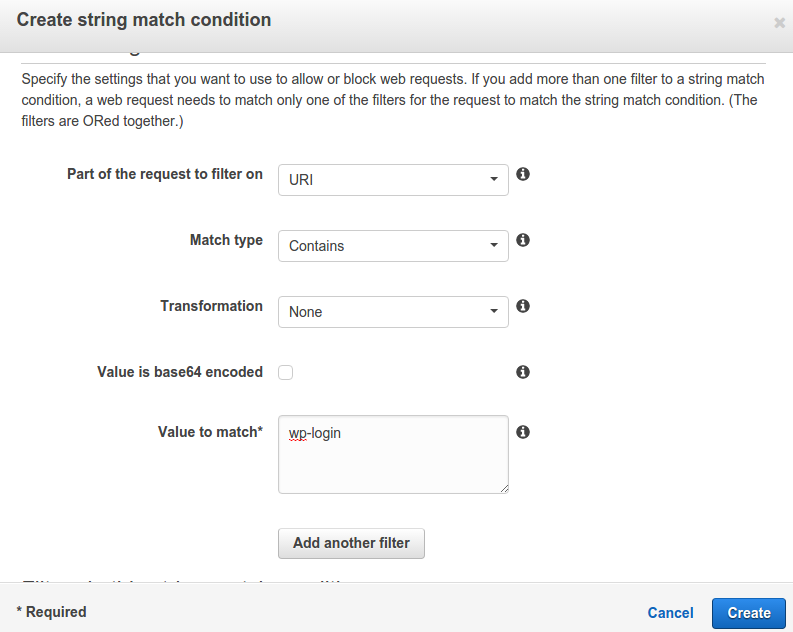
Now, Lets go ahead and create a URI string match condition and we will check for the wp-login string. Click on Create string match condition.
After clicking it will pop out something like:
Give the condition a name. Select the options as above and in the Value to match text enter wp-login. Just click on Create. It will again show a message on the console like:
Click on Next on the the right bottom corner. Now, that your conditions have been created lets apply them to rules.
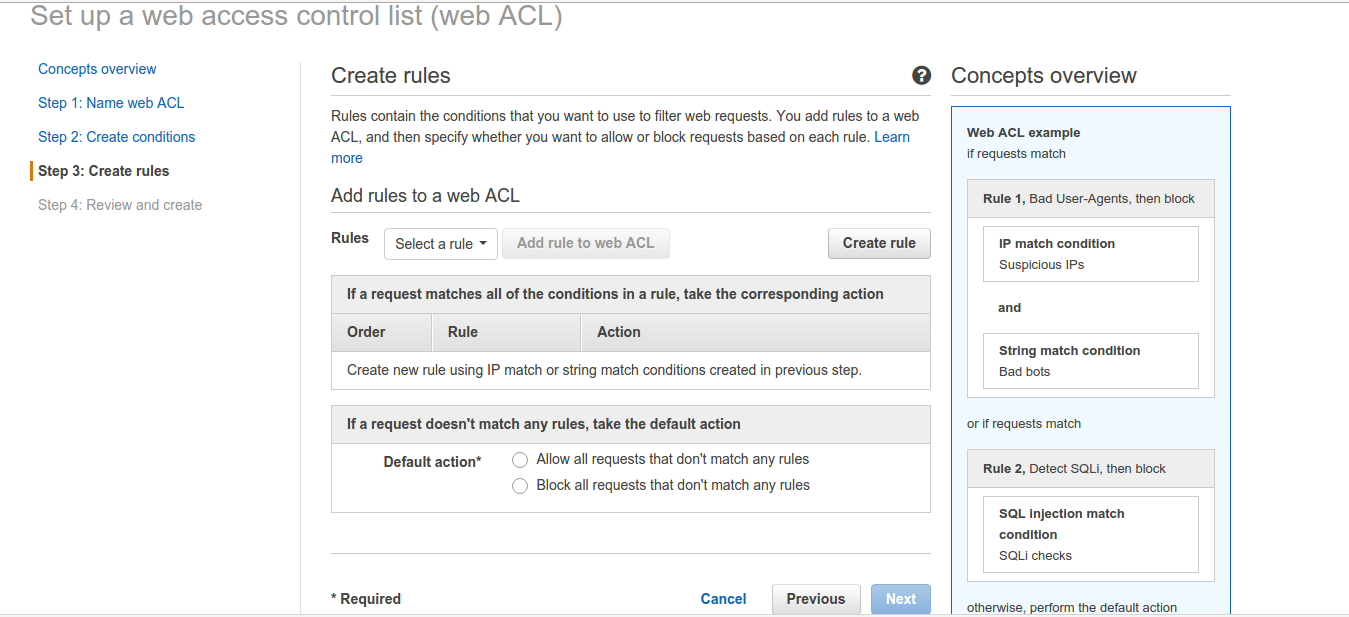
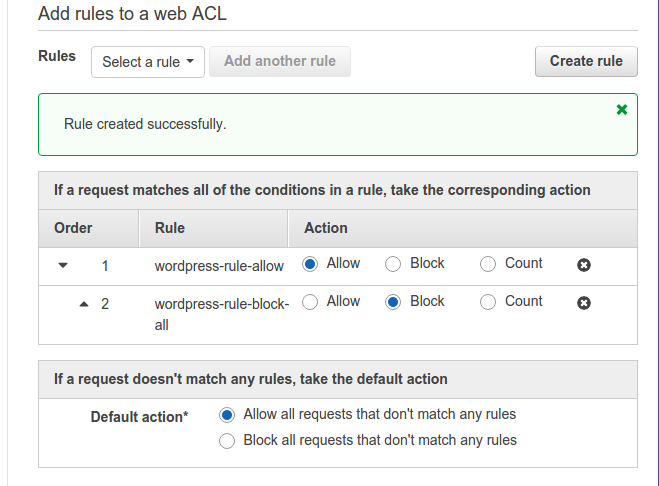
3. Time to create rules. We will create 2 rules. One – whom to allow access to wp-login.php and Two – whom to deny access or block. Click on Create rule.
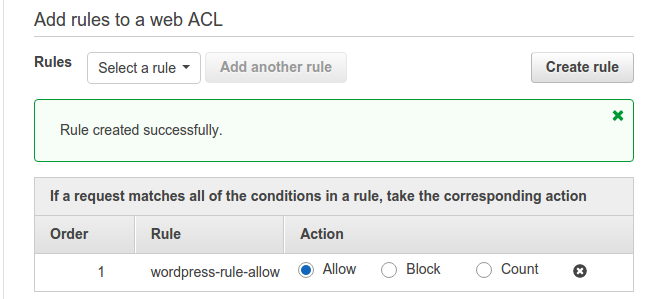
You will get the following windows. Here, name the rule as wordpress-rule-allow to make things clearer and add the following conditions to it for IP as we don’t want to block any requests from this IP. Also, it will create a CloudWatch metric with the same name. We can also do without the allow rule as by default all IPs will be allowed to access wp-login.php. Just filtering the IPs not in the IP condition in step 2 will also do our job.
Click on Create. Now, it will redirect you back to the console. We will select allow this rule as below:
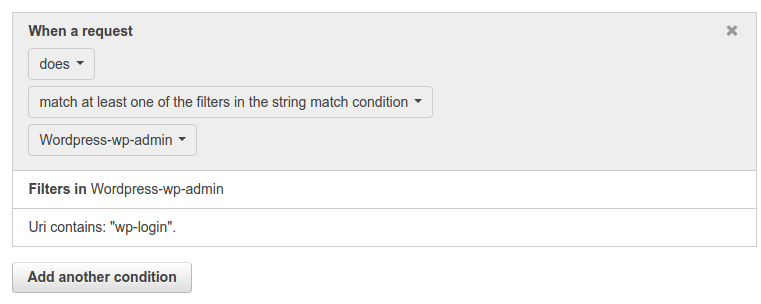
Now, comes the block rule. Click on Create rule again. Name the rule as wordpress-rule-block-all. Now, you need to add the following two conditions:
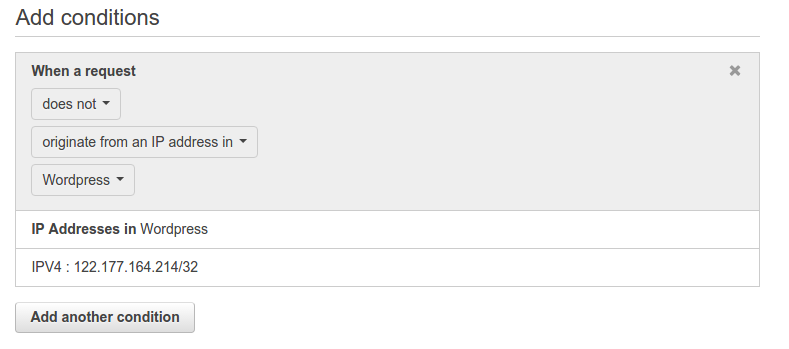
and
Just click on Create. What the second rule will do is that it will check for the client IP address who is making the request matching string “wp-login“. If the IP is not the one specified in the IP address condition we created in step 2, requests to the URI will be blocked for that client. Below is what the rules for this web ACL will look like:
Default action is “Allow all requests that don’t match any rules” else it will block all requests from any client IP. It seems quite obvious.
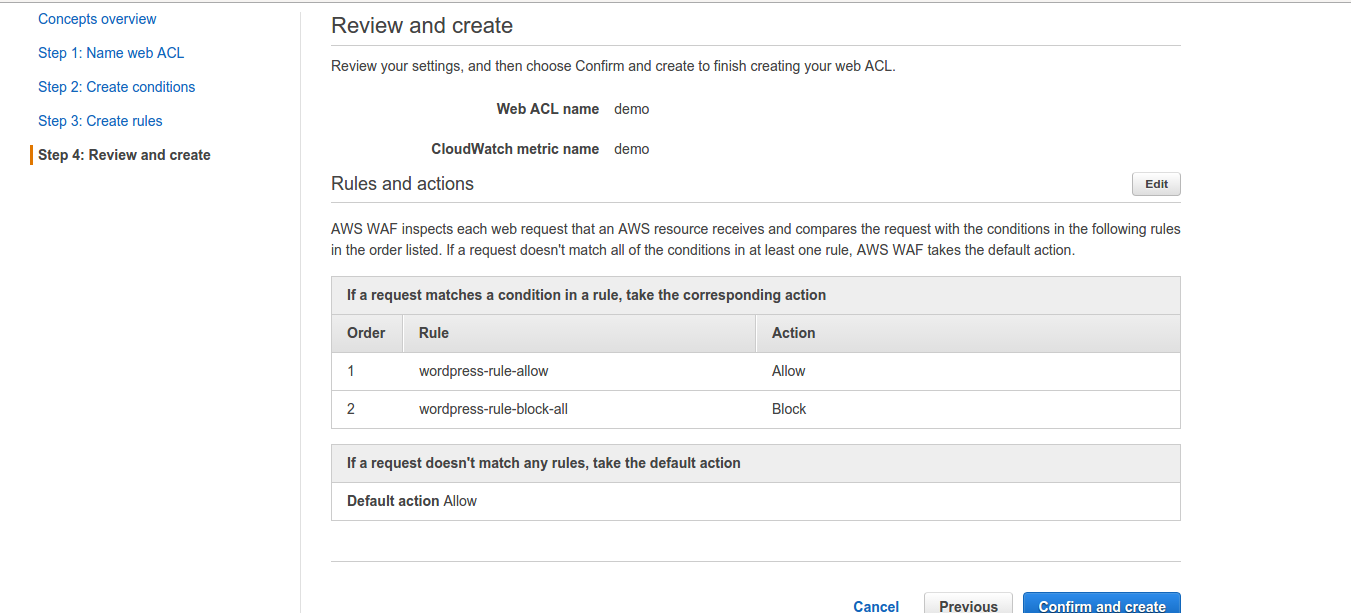
4. Now, is the Review and create step. Review the config and select confirm and Create:
5. The web ACL will be created and listed as below:
You can see the details of requests in the requests tab later when traffic starts flowing. You can edit the web ACL with the “Edit web ACL” as well. REMEMBER: to change the order – make block rule as rule number 1. Now, you need to add this ACL to CloudFront and test. In the Requests tab you can see the traffic and allowed/blocked IPs. Also, there will be a link which will take you to the CloudWatch metric.
6. Go to AWS CloudFront and select the Distribution settings for the Distribution you want to apply the ACL for. In my case I will select the WordPress one and then click on Edit inside Distribution Settings.
Select the ACL you just created. For me its demo. Then click Yes, edit on the bottom right corner of the screen.
Your CloudFront Distribution will show “In Progress” under Status. Once it is Deployed we can go ahead and test.
7. So, lets test. I have changed my IP by connecting to a different network. Now, opened the wp-login page while connected to this network and got the following error:
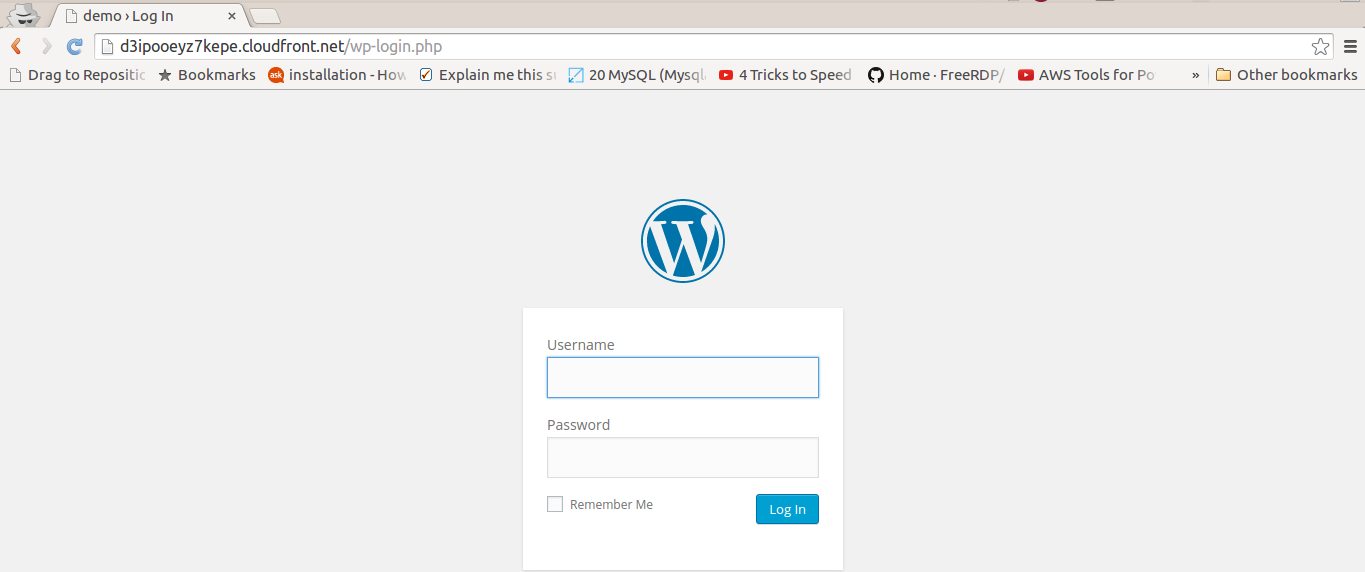
Lets connect to the network I allowed the login page for:
The login page opened:
So, yes, it worked.

 QQ咨询
QQ咨询
